Supplies:
- Two
pieces of paper
- Ruler
- Set of sketch pencils
- Kneaded eraser
- Something Square
- Something Triangular
Let’s start with the square. Taking one of your pieces of
paper, trace your square object.
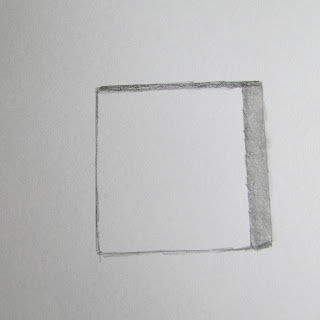
Now, using your ruler, draw a line through your square about
seven eights to the right.
Fill in this portion of your square with even lines, making
sure not to go over the line.
With your Tortillion blend out this side of your square and
add a darker line to the top to add more dimension.
Draw a line behind your square like you did with the circle,
and add a cast shadow.
Blend out the cast shadow with your tortillion
Now you have completed your square. You can add a little
shading around the edges of the part you left white, but if you do don’t round
your shading. Make sure to keep the lines straight, as squares aren’t rounded.
Triangle
Taking your second piece of paper, trace your triangular
object. If you don’t have anything like this, you can also use a ruler to make
your triangle.
Starting at the point of your triangle, draw a diagonal line
until it looks like a pyramid.
Draw straight diagonal lines into this space, creating the
shadow.
Blend out the shadow, making it smooth.
Draw a straight line behind your triangle using your ruler,
and add the cast shadow.
Blend out your cast shadow until smooth, as with the square,
you can also add some shading to the whit part of the triangle, giving it more
dimension. I did it with this one.
I apologize for my pictures not being as good as they could
be. But I had to do this one in a hurry since I’ve been busy with end of the
school year grading and credits. I hope you enjoyed this tutorial!
In my next one I’ll be showing you how to draw and shade the
nose at different angles. Have fun!


No comments:
Post a Comment